
How to Add a Custom Form to a Shopify Product Page (2026)


The native Shopify Forms app can't put a form on a product page. That's the answer most guides bury, and it's why people keep googling this.
You can drop a popup. You can stick a signup block in a footer.
You can't add a custom form to a specific PDP without going around the native app.
This post walks through three options: the theme-editor app block route (easy, app-dependent), the custom Liquid section route (full control, dev required), and the embedded form route (best when the form does more than collect a name + email). Pick based on what your form actually has to do.
Inside this page
Share this
Summarize with AI
Key Takeaways
The native Shopify Forms app can't put a form on a product page. You need a third-party app block, a custom Liquid section, or an embedded form.
Theme app blocks are the fastest path for non-developers, but break on cheap pricing tiers, on Vintage themes, and when too many app scripts pile up.
Custom Liquid sections give full control with no monthly fee, but require a developer and limit you to Shopify's built-in form types unless you bring your own backend.
Embedded forms are the right call when the same form needs to span the storefront and email, run a product recommendation quiz, or sync responses to Klaviyo profiles.
Pick based on what the form actually has to do, not on which tool has the most App Store reviews.
Can you actually add a form to a Shopify product page?
Yes, but not with Shopify's native Forms app. The free Forms app handles popups, overlays, and inline signup blocks, but it doesn't expose a way to drop a custom form onto a specific product template. To do that you need either a third-party form-builder app that ships an app block for themes, a custom Liquid section coded into your theme, or an embedded form pulled in from another platform.
Why people keep asking this: product pages are where intent is highest. A "notify me when back in stock" capture, a "build your own bundle" configurator, a pre-purchase quiz, a custom order request. All of them belong on the PDP, not on a generic contact page. The native Forms app was designed for email capture, not product-context capture and more advanced logic.
What kind of form do you need on the product page?
This is worth pinning down before you install anything. The three most common product-page forms are:
Notify-when-back-in-stock: a one-field email capture tied to a specific variant, fires a transactional email when the variant restocks
Custom order or configurator: monogramming, gift messages, build-your-own-bundle, made-to-order specs that have to travel with the order
Pre-purchase quiz or product finder: a few short questions on the PDP (or just before it) that recommend the right SKU or variant and collect valuable zero-party data
Each one stresses a different part of the form-builder stack. Back-in-stock needs variant-level logic. Configurators need the response data attached to the resulting cart item. Quizzes need branching logic and a recommendation step. A general "form builder" may handle one of these well and not the other two.
Option 1: Use a third-party form app with a theme app block
This is the route most marketers should start with. Most modern Shopify form apps (Hulk, POWR, Powerful Form Builder, Globo) ship as theme app extensions, which means once you install the app, you can add the form to your product page directly from the Shopify theme editor as a block. No code.
The flow:
Install the form app from the Shopify App Store
Build your form inside the app's dashboard (drag fields, set logic if available)
Open Online Store → Themes → Customize, navigate to the Product template
Click "+ Add block" inside the section where you want the form (usually under the buy buttons)
Pick the app's block from the list, configure where the form lives, hit Save
Live in about ten minutes if your theme is current.
When it’s not for you:
The cheapest pricing tier on most form apps locks the field types or the conditional logic you actually need. Read the pricing page and capabilities before you commit.
Some app blocks render with their own inline styles, which means your form won't match your theme out of the box.
App blocks add a script to your storefront. If you stack three or four of these apps, your product page can get slower.
App blocks are only available on Online Store 2.0 themes. If you're on an older Vintage theme, this route doesn't work and you're stuck with Option 2 or Option 3.
Best for: marketers who need a custom contact form, a back-in-stock form, or a simple custom order form on the PDP and don't want to write code.
Option 2: Build a custom Liquid section
If you want full control, no app dependency, and no monthly fee, the Liquid route is yours. Shopify's themes are built from sections (.liquid files in the sections/ directory), and you can hand-write a section that contains a form using the {% form %} Liquid tag.
A barebones product-page contact form section looks like this:
Drop that file into sections/product-question-form.liquid, and it shows up in the theme editor as an addable section on the product template. Submissions email to the store contact address with the product title attached so you know which PDP the question came from.
When it’s not for you:
You need a developer (or to be one). Liquid syntax is forgiving but not intuitive.
The
{% form %}tag only supports a fixed list of built-in form types (about 15 of them):contact,customer(newsletter signup),create_customer(account creation),product(add to cart),cart,customer_login,recover_customer_password, and a handful more. There's no built-in back-in-stock form type, and no built-in survey type, which is why dedicated apps exist. You can't invent your own POST endpoint without an app or a custom backend.Submissions land in your email inbox or your customer notes. If you need them to flow into Klaviyo, Notion, or anywhere else, you're either using webhooks or a Zap.
You own the maintenance. Theme update? Re-test your section.
Best for: stores with a developer on hand, design-heavy brands that need the form to match the theme exactly, and anyone who wants to avoid one more monthly subscription.
Option 3: Embed a form from another platform
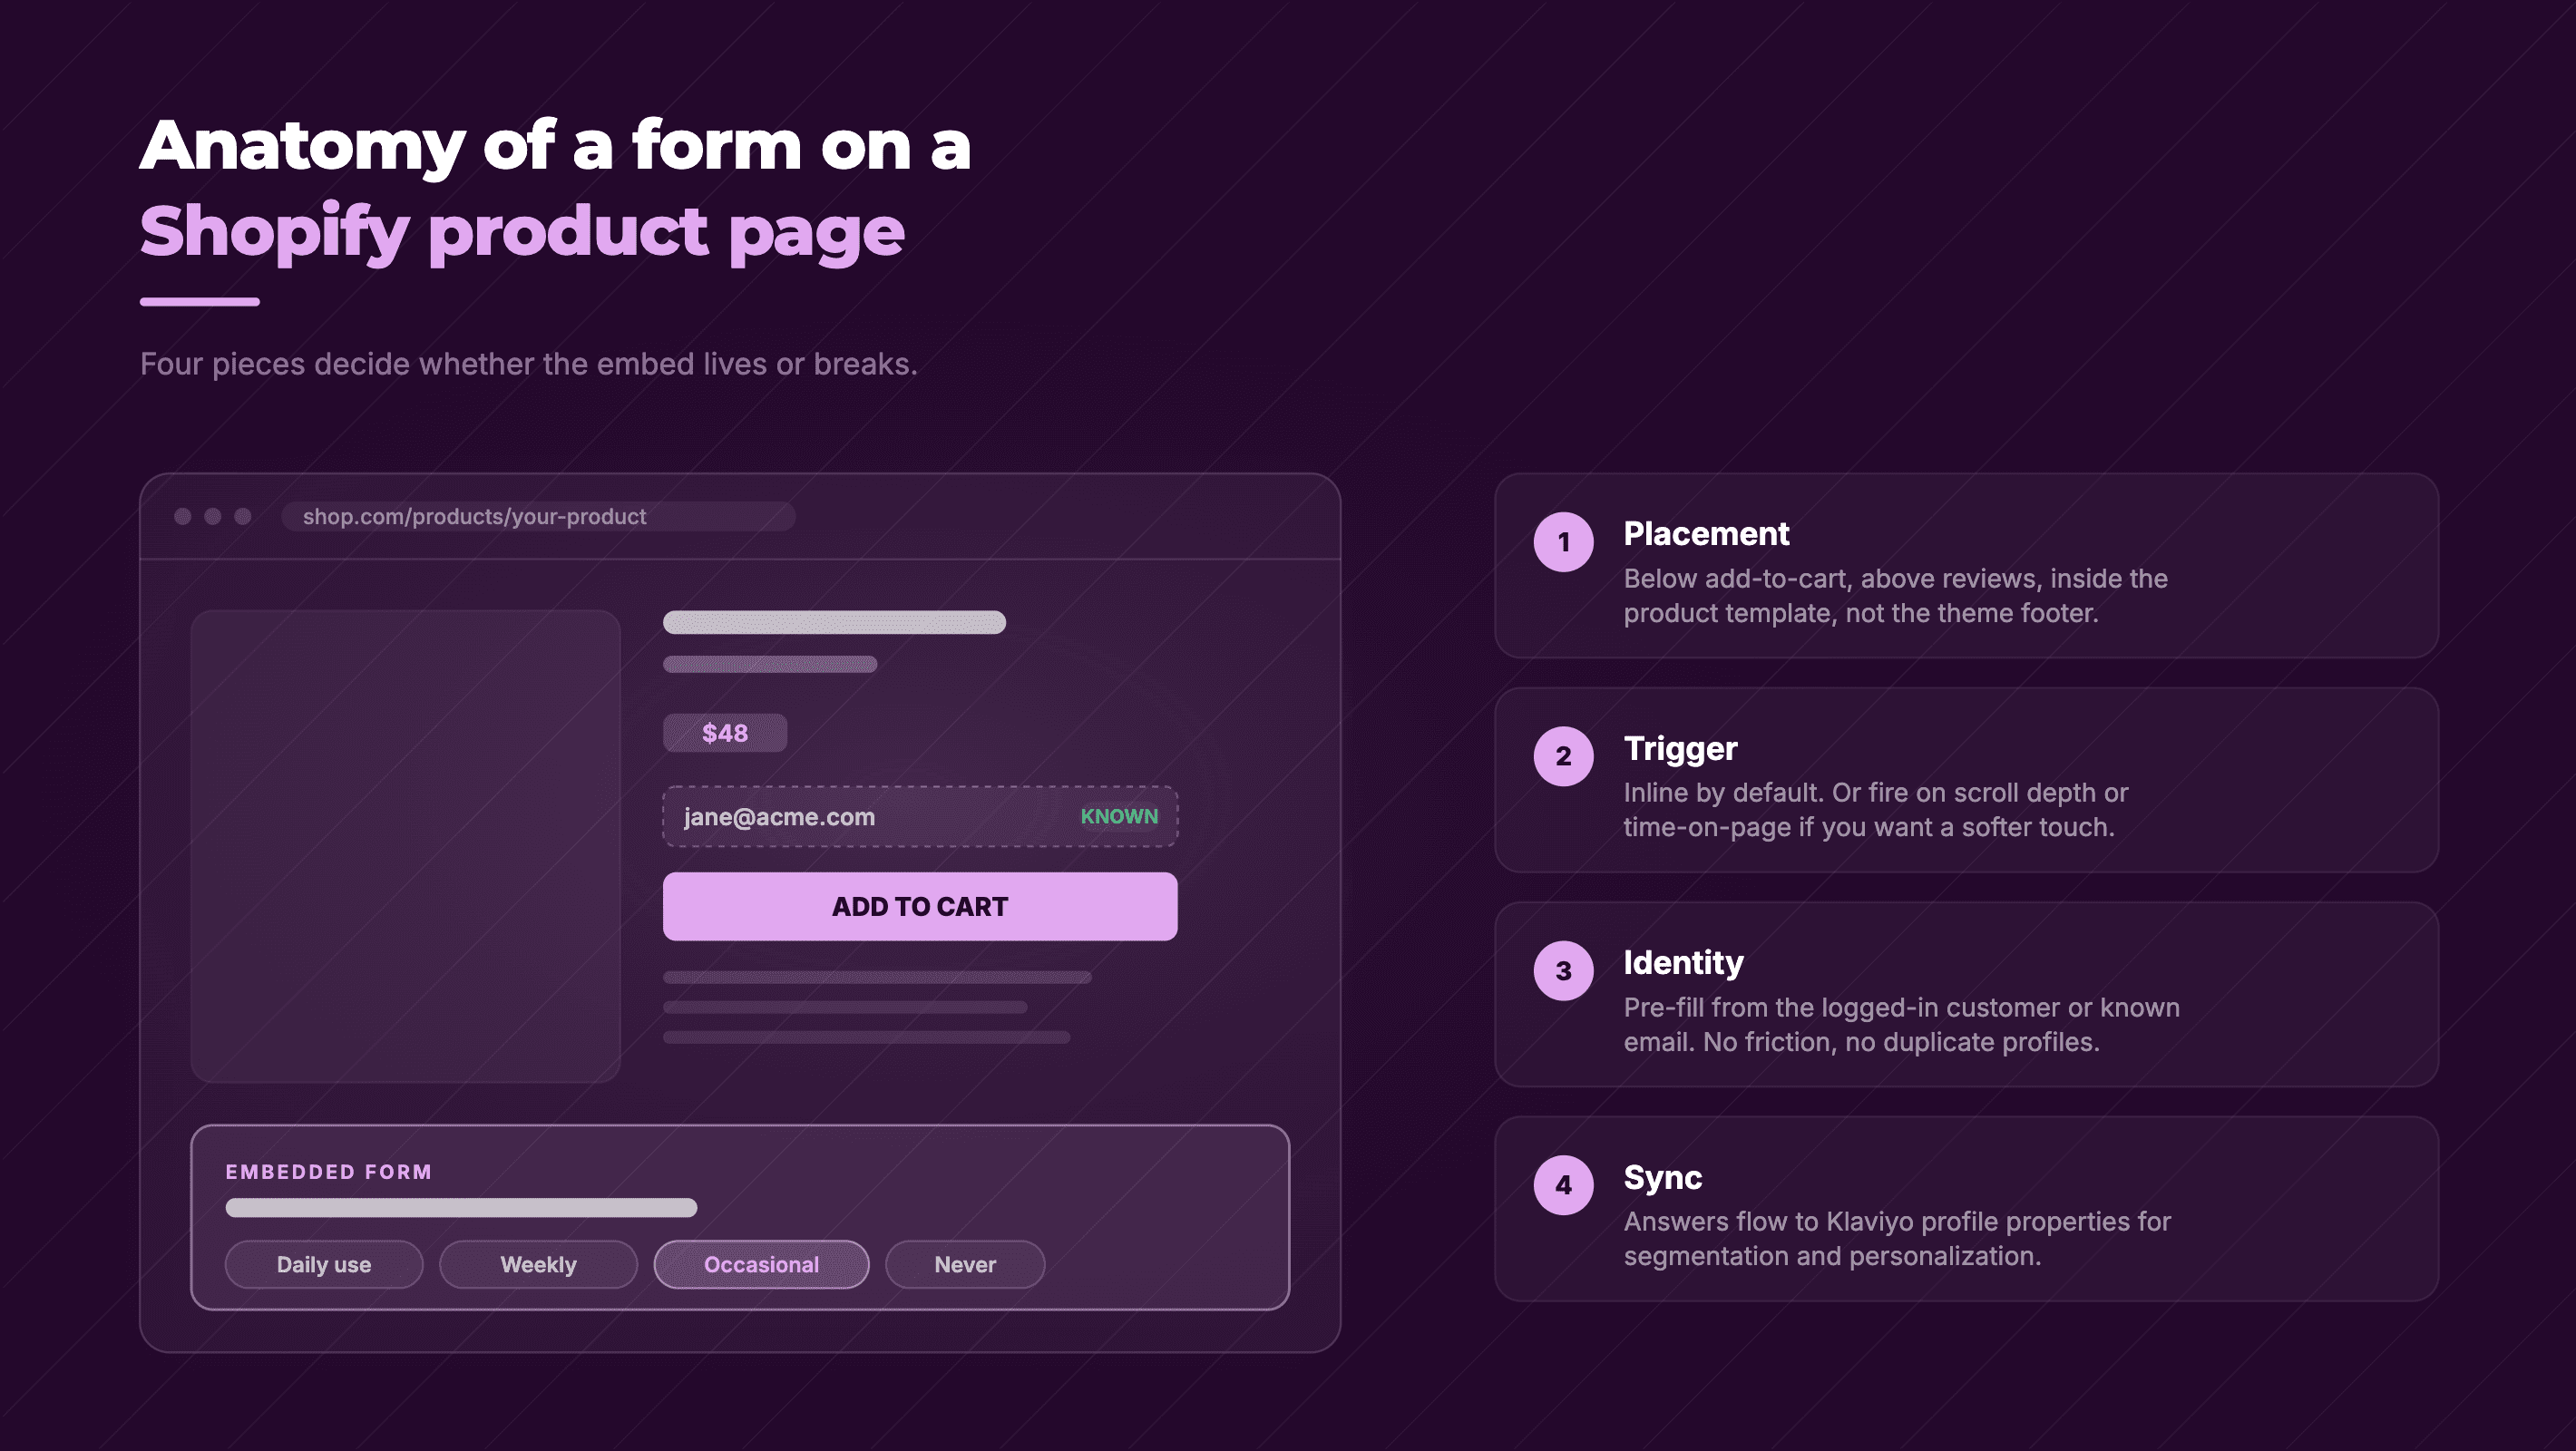
If your product-page form needs to do more than a basic capture (deep conditional logic, product scoring for a recommendation quiz, syncing responses to Klaviyo profile properties), neither Option 1 nor Option 2 is going to be a clean fit. This is where you reach for an embedded form: built in another platform, dropped onto your product page via a theme app block or a small Liquid snippet.
The flow with a tool like Kinetic:
Build the form in Kinetic's no-code builder
Connect Kinetic to your Shopify store and Klaviyo (for product recommendations + data capture)
Add the Kinetic code snippet to your product page in the theme editor
The same form can also be embedded inside a Klaviyo email with conditional end screens, with responses unifying to Klaviyo profiles and an analytics dashboard. That's the bit that's hard to replicate with Option 1 or Option 2. Most form apps live entirely on the storefront, and most email tools live entirely in the inbox. If you want to focus on zero-party data capture, this is the best way to unify all customer touchpoints.
When it’s not for you:
You don’t need advanced features (conditional logic, product recommendations)
The embed adds a script. Same caveat as Option 1.
Best for: stores running product recommendation quiz funnels, brands that want forms to live on both the storefront and inside email, and teams already using Klaviyo who want responses synced to customer profiles.
How to customize the default Shopify contact form on a product page
Worth a brief detour, because "shopify customize contact form" is one of the more searched questions and the answer is annoying.
The default Shopify contact form lives at /pages/contact and is rendered by the theme's templates/page.contact.liquid (or a similarly named file). It's a Liquid {% form 'contact' %} block. To add or change fields, you edit that template directly: add new <input> tags inside the form, give them name="contact[whatever]" so Shopify accepts them, and they'll show up in the email submission.
To put a customized version of the contact form on a product page, you'd take the contact form code and wrap it in a section file (like the example in Option 2 above), then add it as a section in the theme editor on the product template. There's no UI for this in Shopify admin. It's a code edit.
If "edit the contact form" feels heavier than you want, that's a signal you might want to use Option 3 instead.
So which option should you pick?
TL;DR:
Need a back-in-stock form? Most third-party apps have a dedicated back-in-stock app that's better than a generic form builder. Look at Back in Stock or Klaviyo's native back-in-stock flow before reaching for a general form app.
Need a product recommendation quiz funnel, branching logic, or responses syncing to Klaviyo profiles? Option 3 (Kinetic’s embedded forms).
Need a custom contact or question-on-product form? Option 1 (theme app block) for non-devs, Option 2 (Liquid section) if you have a developer.
Need a configurator, gift message, or made-to-order form? Option 1 with an app that supports custom line item properties. Most do, but verify before you install.
Most product-page forms fail not because the tool is bad, but because the form was the wrong fit for the page. A back-in-stock form on a low-restock SKU. A 12-question survey blocking the buy button. A "request a quote" form on a $30 product. Before you install anything, write down: what's the one thing this form needs to do, and what happens with the response? If your answer involves syncing to Klaviyo, scoring against your product catalog, or running the same form as an interactive email later, Kinetic is built for that.
A few patterns that work on product-page forms
Pulled from watching hundreds of D2C brands try this and either nail it or fumble it.
Keep it short. A product-page form competes with the buy button. Two fields max for capture forms, four for configurators, six for quizzes. Anything longer belongs on a separate page or in a post-purchase email.
Make placement obvious. Below the buy button, in an accordion that opens, or in a sticky popup widget. Don't bury the form in a tab nobody clicks.
Tie the response to the product. If the form is on a PDP, the submission should record which product. Most form apps do this with a hidden field; the Liquid example above passes {{ product.title }} as a hidden input.
Decide where the data goes before you build the form. If responses need to land in Klaviyo, pick a tool that integrates natively. If they need to land in your customer service inbox, the default Liquid contact form route is fine.
Have a plan for the data. If you are collecting zero-party data, make sure you have a plan to use the datapoints you collect. They are valuable, and you should utilize them! We created some free playbooks for brands wanting to get started with a zero-party data strategy.
What's next
Once your product-page form is live, the obvious next move is closing the loop on the rest of your zero-party data capture. Most of it doesn't belong on the product page. Newsletter signups belong in a popup. Post-purchase questions belong in an email survey sent a day or two after delivery. Quiz responses and preference data belong on the customer profile in Klaviyo, so you can segment on them later.
If you're rebuilding your form stack from scratch, start with the pillar guide on Shopify forms and work down from there.
FAQs
How do I add a form to a Shopify product page?
You have three options: install a third-party form app that ships a theme app block (no code, fastest), hand-code a custom Liquid section using Shopify's {% form %} tag (full control, requires a developer), or embed a form from another platform like Kinetic. The native Shopify Forms app does not support product-page placement.
Can I customize the default Shopify contact form?
Yes, by editing your theme's templates/page.contact.liquid (or equivalent) file directly. You can add new <input> fields inside the existing {% form 'contact' %} block, naming them contact[fieldname] so Shopify includes them in submissions. There is no admin UI for this — it requires a code edit or a third-party form-builder app.
How do I add a "notify when back in stock" form to a product page?
Most stores use a dedicated back-in-stock app (Back in Stock, Notify! Back in Stock, or Klaviyo's native back-in-stock flow) rather than a general form builder, because back-in-stock forms need variant-level logic and a transactional email trigger. Install the app, configure the trigger conditions, and add its block to your product template.
Do form apps slow down a Shopify product page?
Yes, somewhat. Each app block typically adds a JavaScript file to your storefront, and stacking three or four form/popup/quiz apps will measurably slow page load. Audit your installed apps regularly, remove ones you've stopped using, and prefer apps that load asynchronously.
What's the easiest way to add a custom form to a Shopify product page?
For non-developers, the easiest path is a third-party form-builder app from the Shopify App Store that ships a theme app block: Hulk Form Builder, POWR, or Powerful Form Builder are common starting points. Install, build the form in the app dashboard, then add the block to your product template in the theme editor.